


Setting Up Digital Ocean for Senaite Installation
A Step-by-Step Guide to Configuring Digital Ocean for Senaite


Senaite is an add-on for Plone. Its installation, therefore, is dependent on the successful installation of Plone. Ubuntu and Debian Linux are the most suitable operating systems recommended by Senaite's Official Documentation on which to run Senaite. Installation for Windows and macOS works as well but requires additional packages and is not well documented (yet).
This article will only cover setting up an installation environment on Digital Ocean. Creating an account should be pretty easy; all you need is an active email and a valid payment method (Paypal or Card).
Create Droplet
Once you have logged into your Digital Ocean account, you'll notice a green Create button on the navigation bar. Click that and select Droplets to navigate to the droplet creation page.

Creating a droplet is an easy task as long as you know the kind of system requirements you need. Digital Ocean literally allows you to build a virtual machine to suit whatever needs( and budget) you have. System Requirements Recommended for Senaite have been discussed in a separate article.
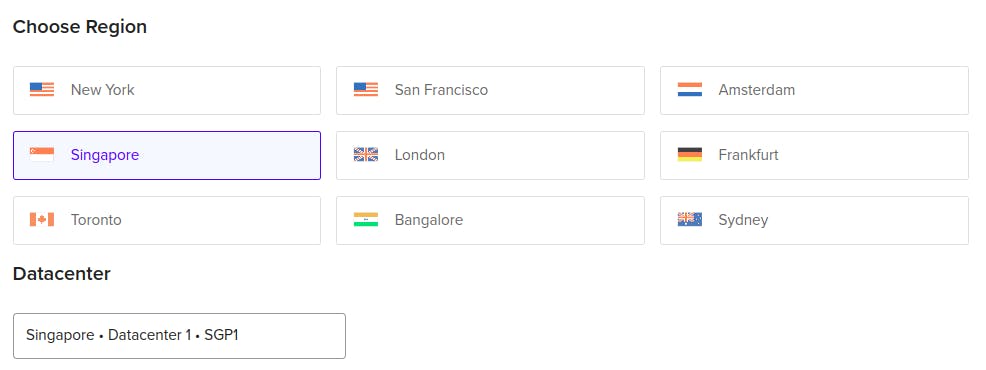
Choose Region
A region is a geographic area with one or more data centres. Select the data center in the region closest to you or your users to avoid any potential latency issues.
Choose Image
There are dozens of images you can pick from the Digital Ocean Market Place but we will pick Ubuntu.
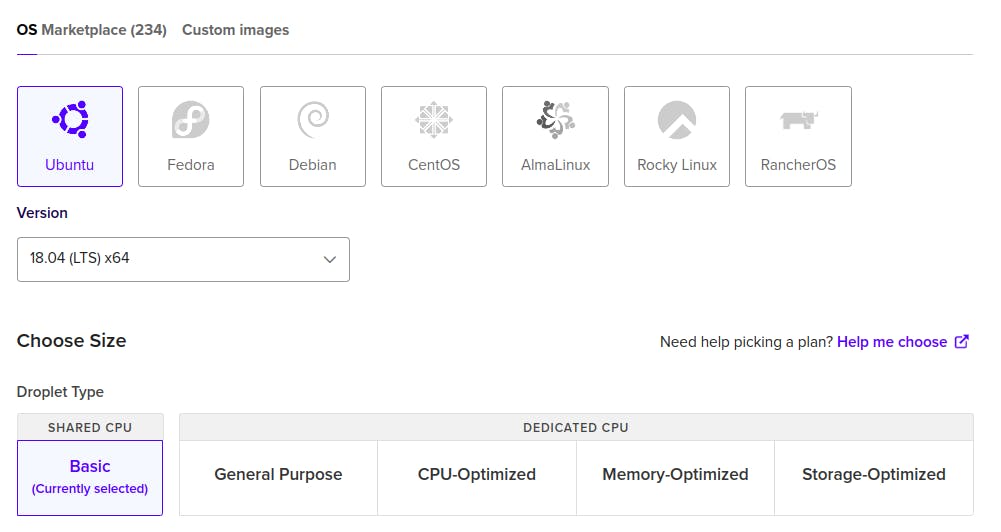
Pick Version
Digital Ocean, at the time of this post, offers 18.04 LTS x64 , 20.04 LTS x64 , 22.04 LTS x64 and 22.10 x64 . We like 18.04 LTS , so that is what we select ;).
Choose Size
This depends entirely on the sort of traffic you intend for Senaite to accommodate. Here will select Basic because we don't need much. We also follow that by selecting the Regular SSD disk type.
Choose Authentication Method
Digital Ocean allows you to access your virtual machine using a Console in your browser. This should be more than enough for your basic needs but if you prefer using your own terminal and a file transfer tool like FileZilla, you'll need to set up a SSH Key. Select SSH Key.
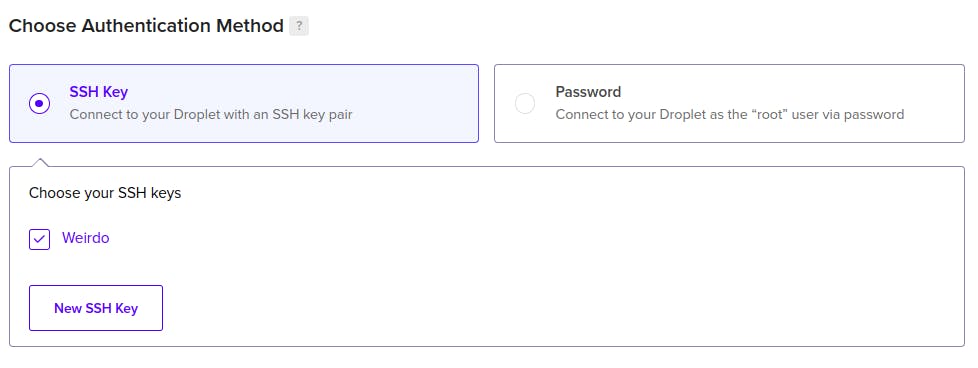
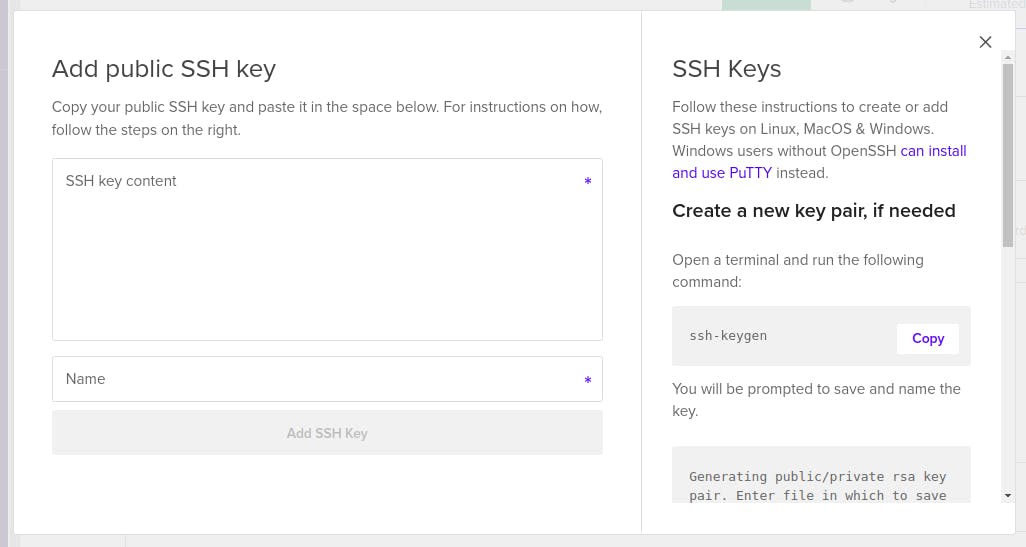
If you had already set up an SSH Key on account creation, you just need to select it as I did above. But if you did not, you just need to click the New SSH Key button and proceed as described. It'll look something like this:
Finalize Details
Finish off by leaving everything as is and clicking Create Droplet. You can also modify the hostname if you want to and change the selected project if you need to.
Done. Give your droplet a minute or less to complete its setup.
Connect via SSH
You will need to have an SSH client installed on your computer to access a server via SSH. Some popular options for SSH clients include PuTTY for Windows and OpenSSH Terminal for Linux and macOS.
Once you have an SSH client installed, you will need to know the IP address of the droplet you want to connect to, as well as the username and password for an account on the server. But since we opted for SSH Key and successfully set it up in the droplet, we do not a username or password. Just the IP address.
If your setup was successful, navigate to the droplets page from the left panel. Identify your droplet and copy the IP address.
tim@Weirdo:~$ ssh root@101.202.303.404
Replace your IP address in the command above and you should be in. If you get any errors at this point, you need to troubleshoot by checking that you have used the correct IP address and that you provided the correct SSH Key while setting up your droplet.
Install Senate
Once you are in, you should be able to access your droplet's file system. Use the guide embedded below to install Plone and Senaite.
Read More
You do some reading more in case you need to find out more information.