

Installing Senaite on Ubuntu 18.04
A Simplified Installation Tutorial Derived from the Official Senaite Installation Manual


Create a new User
We will start by creating a new user named senaite in our system. We do this to have a clean environment to install and run all our dependencies while minimizing the effects of other settings within the system.
While logged in as the root user, create the new user, senaite, storing its data to /home/senaite. Assign our new user sudo permissions then finally switch to the new user.
root@ubuntu:~# whoami
root
root@ubuntu:~# sudo adduser --home /home/senaite --shell /bin/bash senaite
root@ubuntu:~# sudo adduser senaite sudo
root@ubuntu:~# sudo su - senaite
senaite@ubuntu:~$ whoami
senaite
Virtual Environment
We need to install a Virtual Python Environment for us to have full control of all Python libraries and their required versions.
We can work with any one of these tools:
Virtualenv - pypi.org/../virtualenv
Miniconda - conda.io/miniconda
However, will be using Miniconda for the purposes of this tutorial.
Install Miniconda
Although highly unlikely, make sure to download and install Python 2.7 if you do not have one installed already.
Use the snippet below to download Minoconda2, install it and activate the default environment. You can accept the default settings of the miniconda installer.
senaite@ubuntu:~$ wget https://repo.anaconda.com/miniconda/Miniconda2-latest-Linux-x86_64.sh
senaite@ubuntu:~$ bash /home/senaite/Miniconda2-latest-Linux-x86_64.sh
senaite@ubuntu:~$ source /home/senaite/.bashrc
(base) senaite@ubuntu:~$
Setup Conda Environment
Use the snippet below to create a new environment named senaite with a specified python version 2.7 and finally activate the new environment.
(base) senaite@ubuntu:~$ conda create --name senaite python=2.7
(base) senaite@ubuntu:~$ conda activate senaite
(senaite) senaite@ubuntu:~$
Check the Current Session's Active Python Interpreter
Use the command which python to check if the right Python interpreter is active in the current session:
(senaite) senaite@ubuntu:~$ which python
/home/senaite/miniconda2/envs/senaite/bin/python
(senaite) senaite@ubuntu:~$ python
Python 2.7.17 |Anaconda, Inc.| (default, Oct 21 2019, 19:04:46)
[GCC 7.3.0] on linux2
Type "help", "copyright", "credits" or "license" for more information.
>>>
>>>exit() # to leave the python console
Install System Dependencies
Now that we are done preparing the environment for our system, let's go ahead and install the required dependencies for Senaite.
First, run the sudo apt-get update command to download package information from all configured sources.
This step and any other sudo action might fail with the message:
'senaite' is not in the sudoers file. This incident will be reported.
If that happens, it means you probably skipped a key step while creating a new user. You can fix this by switching back to the root user and running sudo adduser senaite sudo. Read more about this error on the Senaite Community. Switch back and continue.
(senaite) senaite@ubuntu:~$ sudo apt-get update
(senaite) senaite@ubuntu:~$ sudo apt install build-essential
(senaite) senaite@ubuntu:~$ sudo apt install python2.7 python2.7-dev
(senaite) senaite@ubuntu:~$ sudo apt install libxml2 libxml2-dev libxslt1.1 libxslt1-dev
(senaite) senaite@ubuntu:~$ sudo apt install libffi-dev libcairo2 libpango-1.0-0 libgdk-pixbuf2.0-0 libpangocairo-1.0-0 libgdk-pixbuf2.0-0
(senaite) senaite@ubuntu:~$ sudo apt install zlib1g zlib1g-dev libjpeg-dev
Install Plone
We achieve this step by installing the Plone Unified Installer which in turn installs Plone and its dependencies from source on most Unix-like platforms.
You can check out the various versions available over at launchpad.net/plone/+download. Grab the link to the desired version and use it in the code snippet below; we use installer version 5.2.9 in this tutorial.
(senaite) senaite@ubuntu:~$ wget --no-check-certificate
https://launchpad.net/plone/5.2/5.2.9/+download/Plone-5.2.9-UnifiedInstaller-1.0.tgz
(senaite) senaite@ubuntu:~$ tar -xf Plone-5.2.9-UnifiedInstaller-1.0.tgz
(senaite) senaite@ubuntu:~$ cd Plone-5.2.9-UnifiedInstaller-1.0
(senaite) senaite@ubuntu:~$ ./install.sh standalone --target=/home/senaite --instance=senaitelims --password=admin
In the snippet above, the first line downloads the installer, the second line unzips the installer, the third line navigates to the inside of the installer and the last line runs the installer. We install SENAITE in the directory /home/senaite/senaitelims and we have set the admin password to admin
The flag --target points to the location of our new installation, --instance defines the name of our installation instance and --password sets the default password.
This step might fail with the message:
Unable to find python3.8 on system exec path.
Please do one of the following:
Install python3.8 or python3.6+ as a system dev package;
Use --with-python=... option to point the installer to a useable python.
The error means that the installer did not find the python version it expected. We run which python to find the path to the correct version and use that path with the --with-python flag.
(senaite) senaite@ubuntu:~$ which python
/home/senaite/miniconda2/bin/python
(senaite) senaite@ubuntu:~$ ./install.sh standalone --target=/home/senaite --instance=senaitelims --password=admin --with-python=/home/senaite/miniconda2/bin/python
If you do not use the arguments inline, you will be prompted by a GUI to enter these same values.
Install Senaite
We're almost done. I am proud of you!
Modify Buildout
Now that we have installed all the system dependencies that Plone requires and successfully installed Plone itself, it's now time to install Senaite.
We had mentioned earlier that Senaite is an add-on for Plone, therefore to install it, we just need to add it to the buildout.cfg config file generated by Plone during its installation.
You can modify the config file using either vim, nano or any other terminal-based editor. Here we'll use nano.
(senaite) senaite@ubuntu:~$ cd /home/senaite/senaitelims
(senaite) senaite@ubuntu:~$ nano buildout.cfg
Append senaite.lims and simplejson to the eggs section of the file:
[buildout]
...
eggs =
    ...
    senaite.lims
    simplejson
zcml =
...
Modify the versions section of the file as follows:
[versions]
zc.buildout =
setuptools =
Pillow = 5.1.0
cssselect2 = 0.2.2
soupsieve = 1.9.5

buildout.sanitycheck = 1.0.2
collective.recipe.backup = 4.0
plone.recipe.unifiedinstaller = 5.2b1
Remember to leave
zc.buildoutandsetuptoolsundefined/unpinned.
Upgrade Pip, Setuptools and zc.buildout
We need to ensure that pip, setuptools, and zc.buildout are available in a compatible version. We do that by creating a requirements.txt file and adding the text below:
setuptools==39.2.0
zc.buildout==2.13.2
pip==19.3.1
We then finish this step by installing the requirements with the pip command of the local Python environment and re-running the buildout script.
(senaite) senaite@ubuntu:~$ nano requirements.txt
(senaite) senaite@ubuntu:~$ pip install -r requirements.txt
(senaite) senaite@ubuntu:~$ PYTHONHTTPSVERIFY=0 buildout
DONE!!!
Running Senaite
If the buildout runs successfully without any errors, we can now go ahead and run Senaite from the terminal.
Debug Mode
(senaite) senaite@ubuntu:~$ bin/instance fg
2022-11-27 19:42:17,939 INFO    [Zope:45][MainThread] Ready to handle requests
Starting server in PID 19438.
Serving on http://0.0.0.0:8080
Press CTRL+C on your keyboard to stop the server.
Production
(senaite) senaite@ubuntu:~$ bin/instance start
daemon process started, pid=19584
(senaite) senaite@ubuntu:~$ bin/instance stop
daemon process stopped
You can now go to your browser and navigate to http://localhost:8080 or http://your.public.ip:8080 to access Senaite.
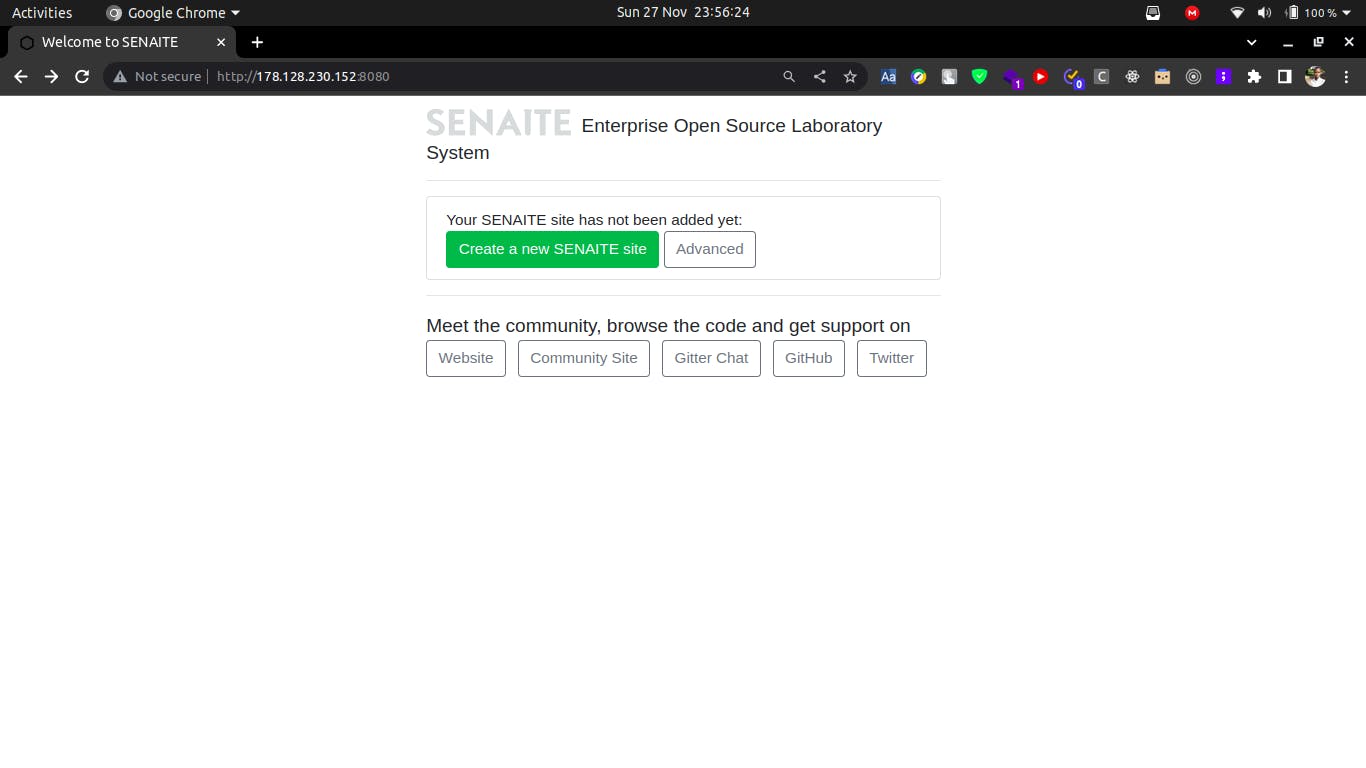
Use admin as username and admin as the password to proceed to the next page.
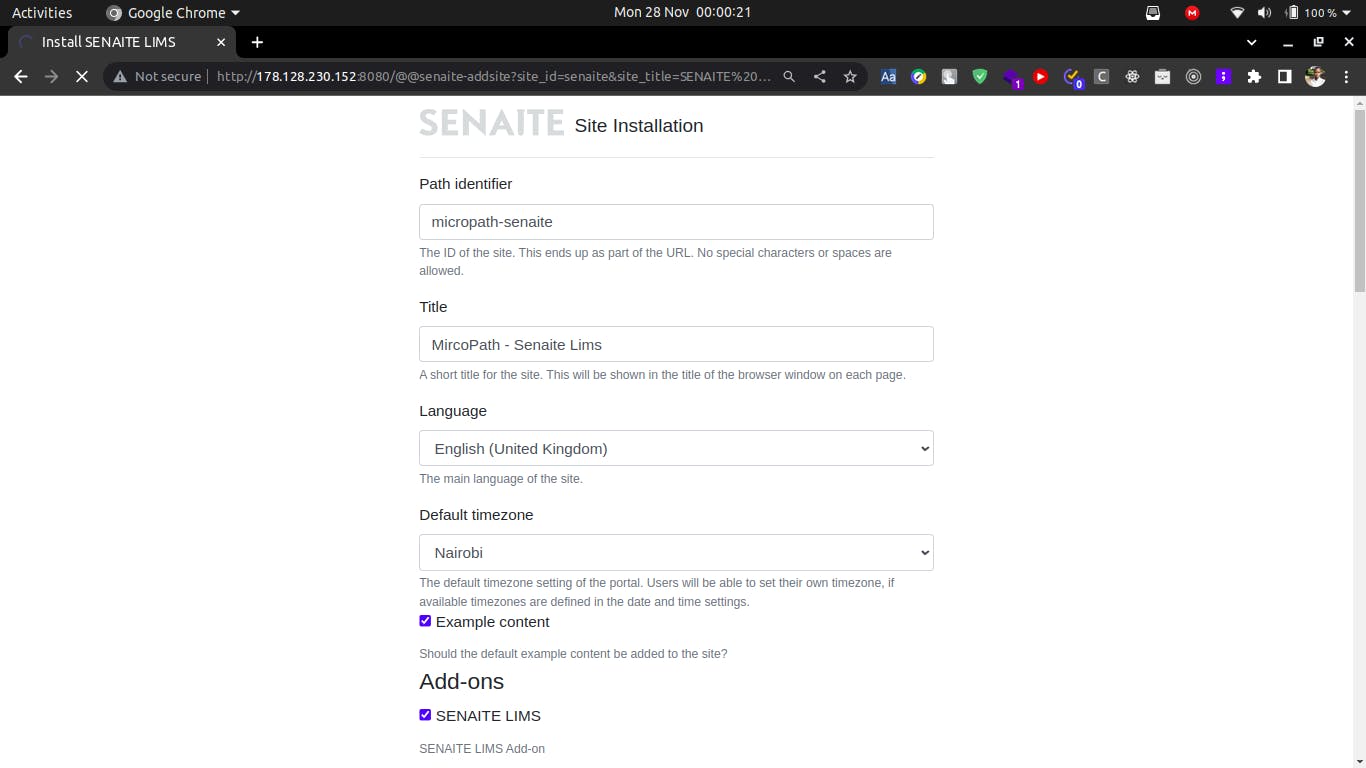
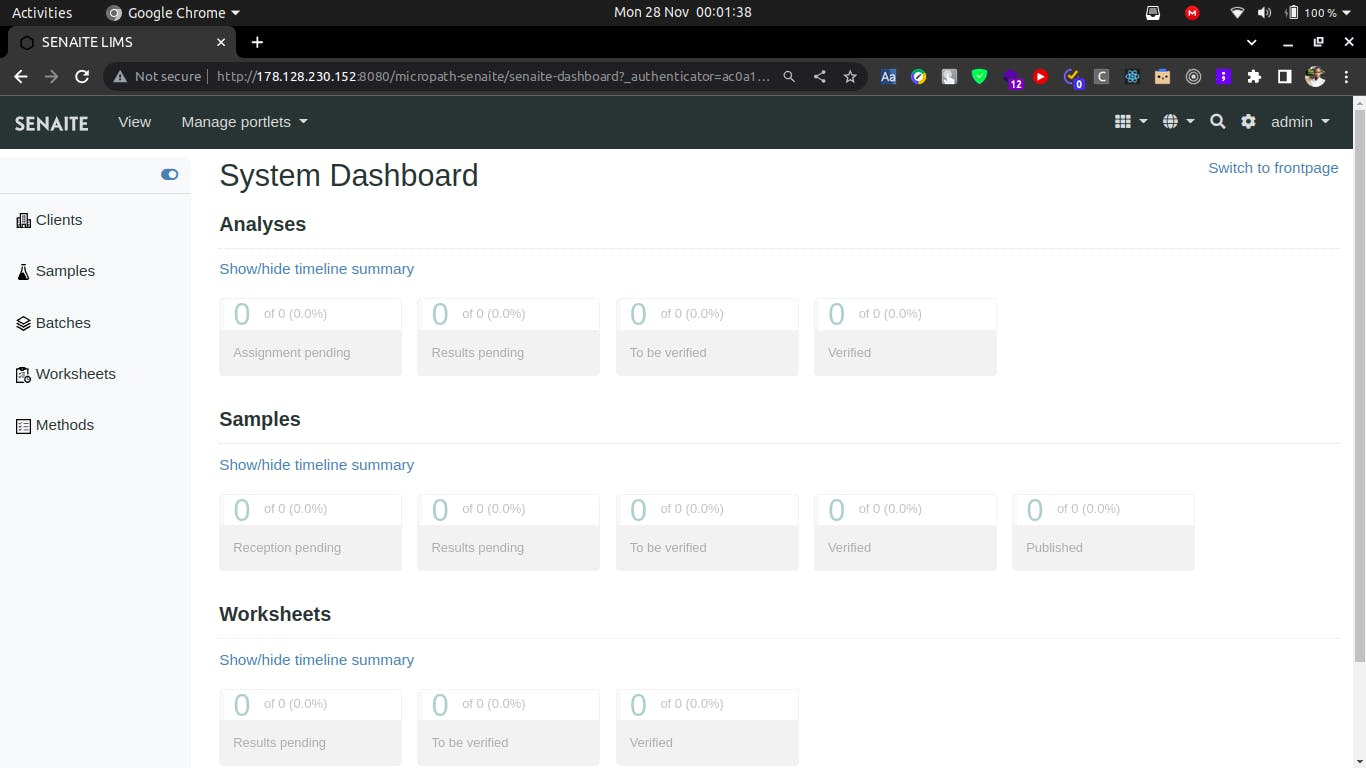
You can continue with the default settings and press the Install SENAITE LIMS button. After a few moments, SENAITE should be installed and the dashboard view appears.
Congratulations, You Have Made It Happen!!!